Maintenance calendar
Avoiding equipment breakdowns, and blocks in warehouse work centers, requires constant equipment maintenance. Timely corrective maintenance for machines and tools that break unexpectedly, as well as preventive maintenance to ensure that such issues are avoided, are key to keeping warehouse operations running smoothly.
In Odoo Maintenance, users can access the Maintenance Calendar to create, schedule, and edit both corrective and preventive maintenance requests, to stay on top of equipment and work centers.
Create maintenance request
Maintenance requests can be created directly from the Maintenance Calendar. To access the calendar, navigate to .
To create a new request, click anywhere on the calendar. Doing so opens a New Event pop-up window. In the Name: field, assign a title to the new request.
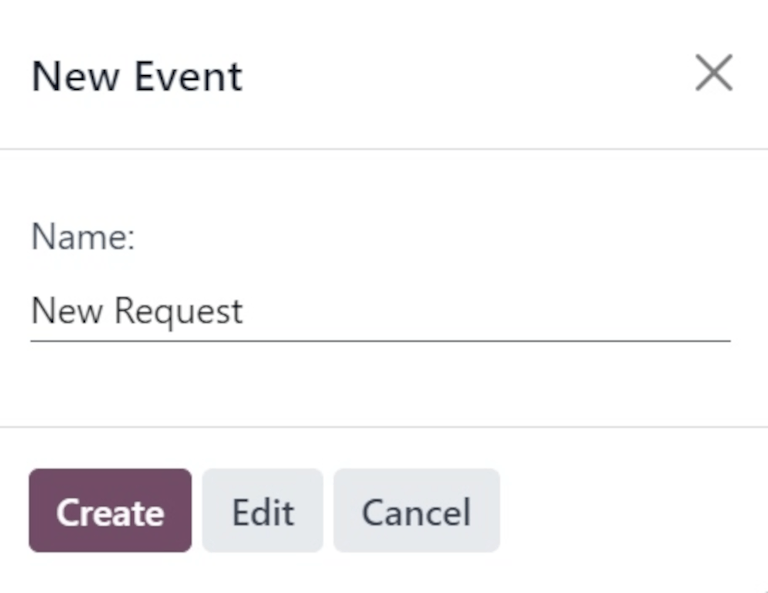
Clicking Create on the pop-up window saves the new request with no additional details. If the request’s creation should be canceled, click Cancel.
To add more details and schedule the request for a specific date and time, click Edit.
Clicking Edit opens a blank maintenance request form, where various details about the request can be filled out.
Edit maintenance request
In the Request field, assign a title to the new request. In the Created By field, from the drop-down menu, select which user the request was created by. By default, this field populates with the user actually creating the request.
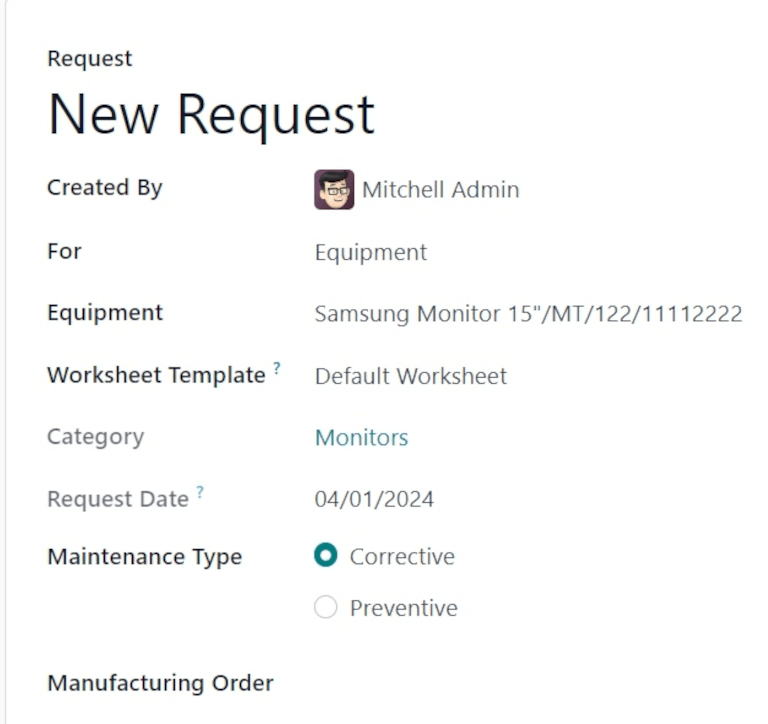
In the For field, from the drop-down menu, select if this request is being created for a piece of Equipment, or a Work Center.
Note
If Work Center is selected in the For field’s drop-down menu, two additional fields appear on the form: Work Center and Block Workcenter.
In the Work Center field, select which work center in the warehouse this maintenance request applies to.
If the Block Workcenter option’s checkbox is ticked, it is not possible to plan work orders, or other maintenance requests, in this work center during the time that this request is being performed.
If Equipment is selected in the For field, which it is by default, select which machine or tool requires maintenance from the Equipment field. Once a specific piece of equipment is selected, a greyed-out Category field appears, listing the Equipment Category to which the equipment belongs.
In the Worksheet Template field, if necessary, click the drop-down menu to select a worksheet template. These templates are custom templates that can be filled out by the employee performing the maintenance.
Under the Category field, the Request Date field displays the date requested for the maintenance to happen.
The Maintenance Type field provides two selectable radio button options: Corrective and Preventive.
Corrective maintenance is for requests that arise for immediate needs, such as broken equipment, while Preventive maintenance is for planned requests, to avoid breakdowns in the future.
If this request is tied to a specific MO, select that MO from the Manufacturing Order field.
From the drop-down menu for the Team field, select the desired maintenance team who will perform the maintenance. In the Responsible field, select the technician responsible for the request.
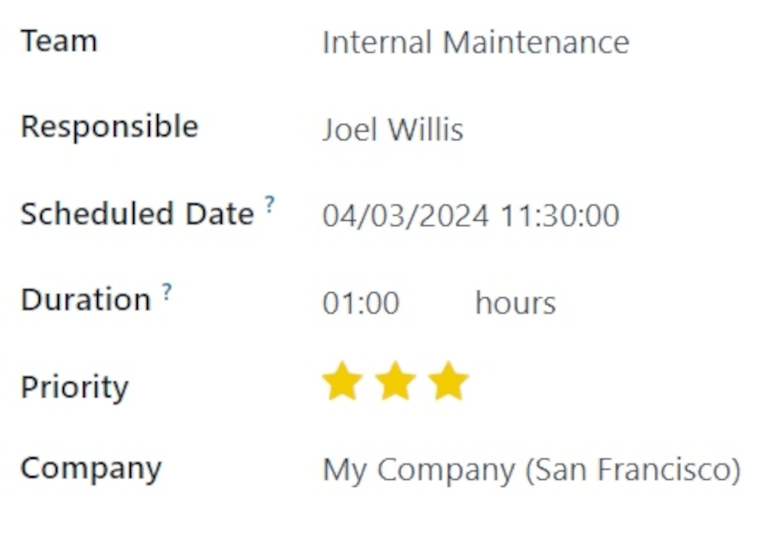
In the Scheduled Date field, click the date to open a calendar popover. From this popover, select the planned date of the maintenance, and click Apply to save the date.
In the Duration field, enter the the amount of hours (in a 00:00 format) that the
maintenance is planned to take.
In the Priority field, choose a priority between one and three ⭐⭐⭐ (stars). This indicates the importance of the maintenance request.
If working in a multi-company environment, from the drop-down menu in the Company field, select the company to which this maintenance request belongs.
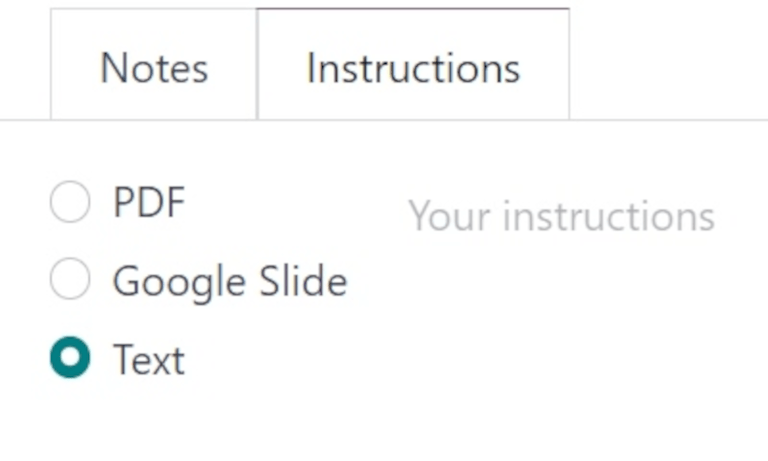
At the bottom of the form, there are two tabs: Notes and Instructions.
In the Notes tab, type out any internal notes for the team or technician assigned to the request, if necessary.
In the Instructions tab, if necessary, select one of the three radio button options to provide maintenance instructions to the assigned team or technician. The available methods for providing instructions are via PDF, Google Slide, or Text.
Calendar elements
The Maintenance Calendar provides various views, search functions, and filters to help keep track of the progress of ongoing and planned maintenance requests.
The following sections describe elements found across various views of the calendar.
Filters and Favorites
To access the maintenance calendar, navigate to .
To add and remove filters for sorting data on the Maintenance Calendar, click the 🔻 (triangle pointed down) icon, to the right of the search bar at the top of the page.
The left-hand side of the resulting drop-down menu lists all the different Filters users can select. By default, To Do and Active are selected, so all open requests are displayed.
Tip
To add a custom filter to the Maintenance Calendar, click Add Custom Filter, under the Filters section of the drop-down menu. This opens an Add Custom Filter pop-up window.
From this pop-up window, configure the properties of the new rule for the filter. Once ready, click Add.
The right-hand side of the drop-down menu lists the Favorites, or any searches that have been saved as a favorite to be revisited at a later date.
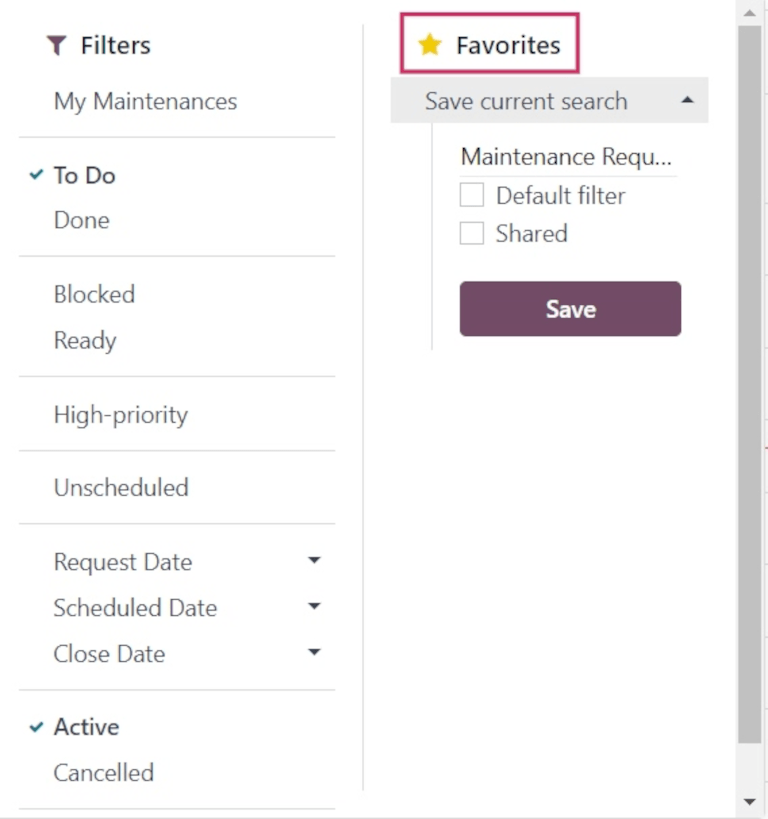
To save a new Favorite search, select the desired Filters. Then, click Save current search. In the field directly below Save current search, assign a name to the search.
Under the assigned name, there are two options, to save the current search either as the Default filter, or as a Shared filter.
Selecting Default filter sets this filter as the default when opening this calendar view.
Selecting the Shared filter makes this filter available to other users.
Once ready, click Save. When clicked, the new Favorite filter appears in the Favorites column, and a ⭐ (gold star) icon appears with the filter’s name in the search bar.
Views
The Maintenance Calendar is available in six different views: Calendar (default), Kanban, List, Pivot, Graph, and Activity.
Calendar view
Calendar is the default view displayed when the Maintenance Calendar is opened. There are a number of options in this view type for sorting and grouping information about maintenance requests.
In the top-left corner of the page, there is a drop-down menu set to Week, by default. Clicking that drop-down menu reveals the different periods of time, in which the calendar can be viewed: Day, Month, and Year. There is also an option to Show weekends, selected by default. If unselected, weekends are not shown on the calendar.
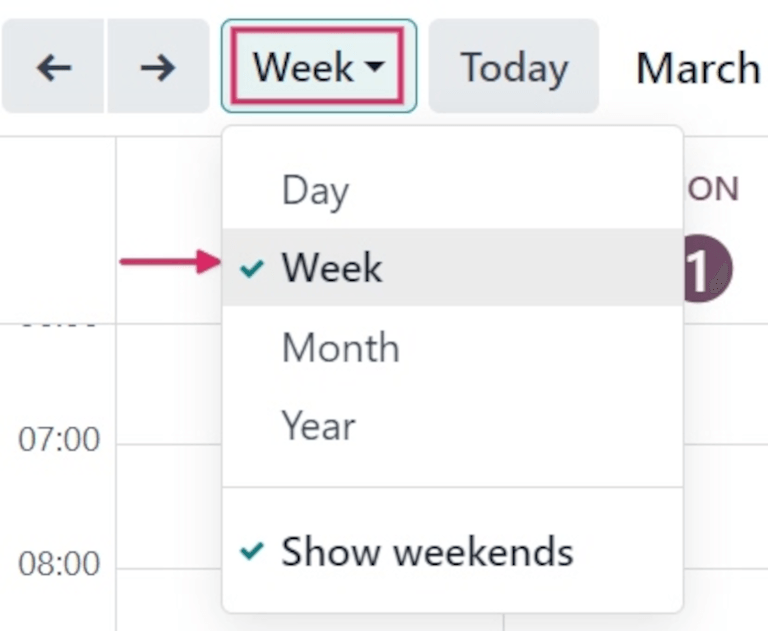
To the left of this menu, there is a ⬅️ (left arrow) icon and a ➡️ (right arrow) icon. Clicking these arrows moves the calendar backward or forward in time, respectively.
To the right of the drop-down menu set to Week, by default, is a Today button. Clicking this button resets the calendar to view today’s date, no matter which point in time is being viewed before clicking it.
At the far-right side of the page is a sidebar column, containing a minimized calendar set to today’s date, and a Technician list, displaying all the Technicians with requests currently open. Click the (panel) icon at the top of this sidebar to open or close the sidebar.
Note
The Technician list only displays if technicians are assigned to open requests, and individual technicians are only listed, if they are listed as Responsible on at least one maintenance request form.
Kanban view
With the Kanban view, all open maintenance requests are displayed in Kanban-style columns, in their respective stages of the maintenance process.
Each maintenance request appears on its own task card, and each task card can be dragged-and-dropped to a different stage of the Kanban pipeline.
Each column has a name (i.e. In Progress). Hovering at the top of a column reveals a ⚙️ (gear) icon. Clicking the ⚙️ (gear) icon reveals a list of options for that column: Fold, Edit, Automations, and Delete.
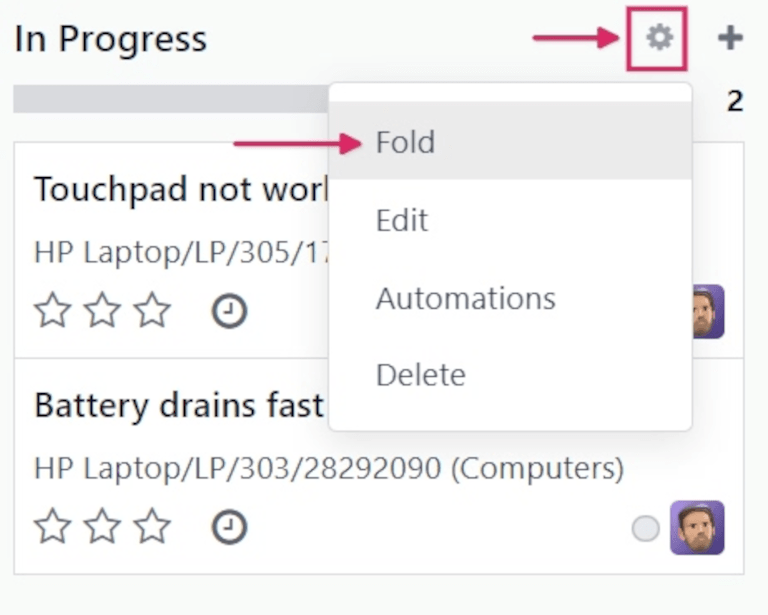
Clicking Fold folds the column to hide its contents.
Clicking Edit opens an Edit: (stage name) pop-up window, with the corresponding stage name, wherein the column’s details can be edited. The following are the column options that can be edited:
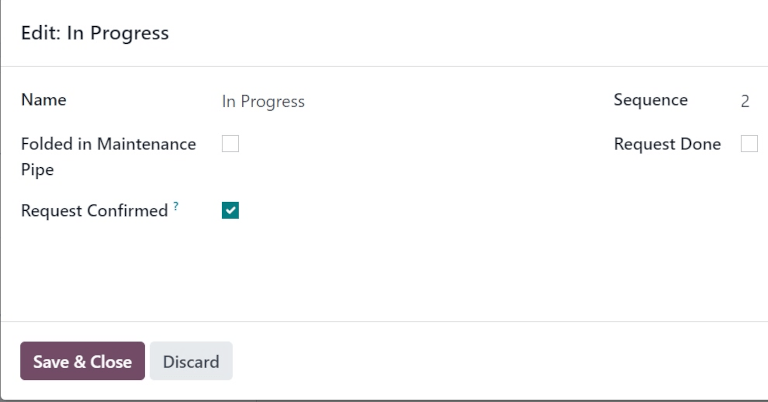
Name: the name of the stage in the Kanban pipeline.
Folded in Maintenance Pipe: when checked, this stage’s column is folded by default in the Kanban view type.
Request Confirmed: when this box is not ticked, and the maintenance request type is set to Work Center, no leave is created for the respective work center when a maintenance request is created. If the box is ticked, the work center is automatically blocked for the listed duration, either at the specified date, or as soon as possible, if the work center is unavailable.
Sequence: the order in the maintenance process, in which this stage appears.
Request Done: if ticked, this box indicates this stage is the final step of the maintenance process. Requests moved to this stage are closed.
Once ready, click Save & Close. If no changes have been made, click Discard, or click the X icon to close the pop-up window.
List view
With the List view selected, all open maintenance requests are displayed in a list, with information about each request listed in its respective row.
The columns of information displayed in this view type are the following:
Subjects: the name assigned to the maintenance request.
Employee: the employee who originally created the maintenance request.
Technician: the technician responsible for the maintenance request.
Category: the category the equipment being repaired belongs to.
Stage: the stage of the maintenance process the request is currently in.
Company: if in a multi-company environment, the company in the database the request is assigned to.
Pivot view
With the Pivot view selected, maintenance requests are displayed in a pivot table, and can be customized to show different data metrics.
To add more data to the pivot table, click the Measures button to reveal a drop-down menu. By default, Count is selected. Additional options to add to the table are Additional Leaves to Plan Ahead, Duration, and Repeat Every.
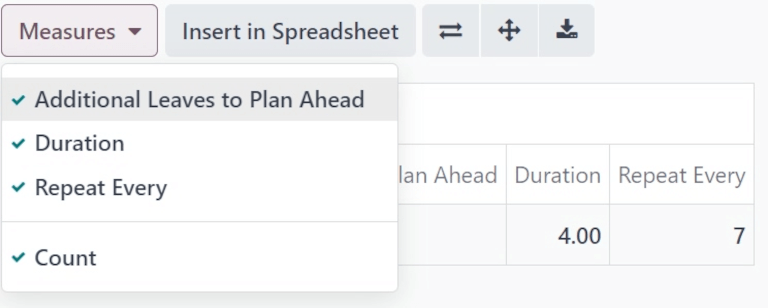
To the right of the Measures button is the Insert in Spreadsheet button. Clicking this button opens a pop-up window titled Select a spreadsheet to insert your pivot..
There are two tabs in this pop-up window: Spreadsheets and Dashboards. Click into one of these tabs, and select a spreadsheet or dashboard in the database to add this pivot table to. Once ready, click Confirm. If this table shouldn’t be added to a spreadsheet or dashboard, click Cancel, or click the X icon to close the pop-up window.
To the right of the Insert in Spreadsheet button are three buttons:
Flip axis: the x and y axis of the pivot data table flip.
Expand all: all the available rows and columns of the pivot data table expand fully.
Download xlsx: the pivot data table is downloaded as an .xlsx file.
Graph view
With the graph view selected, the following options appear between the search bar and visual representation of the data. These graph-specific options are located to the right of the Measures and Insert in Spreadsheet buttons.
There are three different types of graphs available to users to view the data:
Bar Chart: the data is displayed in a bar chart.
Line Chart: the data is displayed in a line chart.
Pie Chart: the data is displayed in a pie chart.
When viewing the data as a Bar Chart graph, the data can be formatted in the following ways:
Stacked: the data is stacked on the graph.
Descending: the data is displayed in descending order.
Ascending: the data is displayed in ascending order.
When viewing the data as a Line Chart graph, the data can be formatted in the following ways:
Stacked: the data is stacked on the graph.
Cumulative: the data is increasingly accumulated.
Descending: the data is displayed in descending order.
Ascending: the data is displayed in ascending order.
When viewing the data as a Pie Chart graph, all relevant data is displayed by default, and no additional formatting options are available.
Activity view
With the Activity view selected, all open maintenance requests are listed in their own row, with the ability to schedule activities related to those requests.
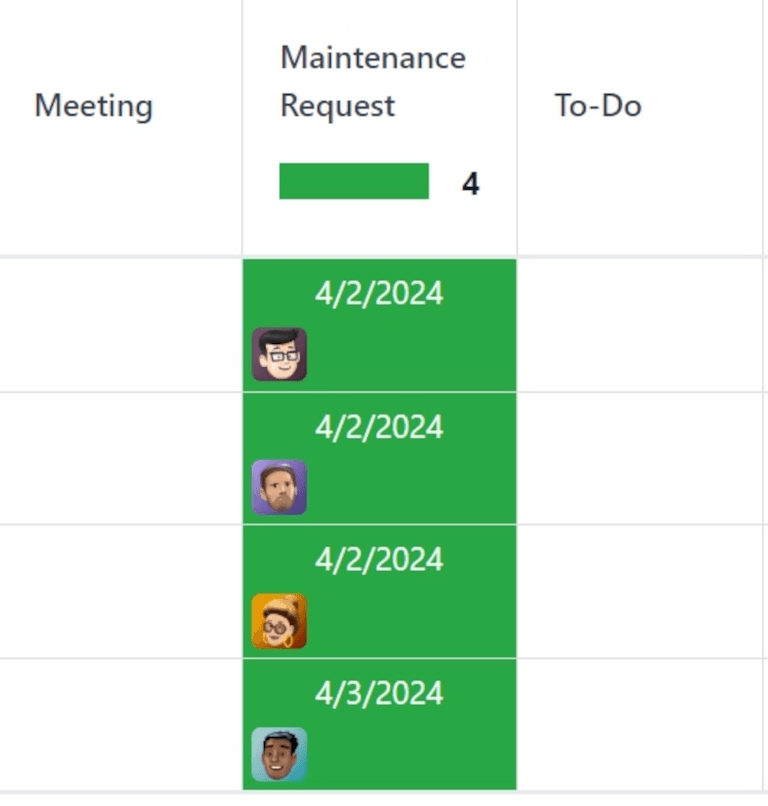
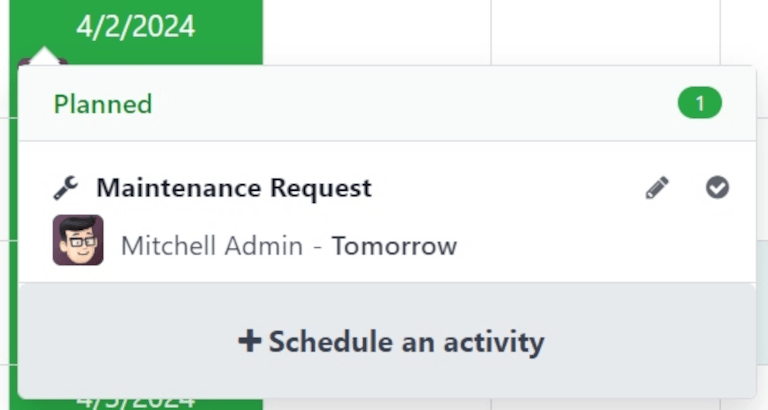
Maintenance requests are listed in the Maintenance Request column as activities. Clicking a request opens a Maintenance Request popover that indicates the status of the request, and the responsible technician. To schedule an activity directly from the popover, click ➕ Schedule an activity. This opens a Schedule Activity pop-up window.
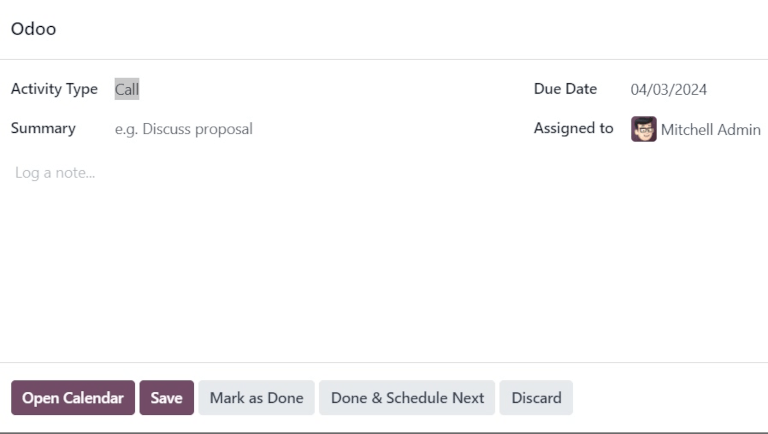
From the pop-up window, choose the Activity Type, provide a Summary, schedule a Due Date, and choose the responsible user in the Assigned to field.
Type any additional notes for the new activity in the blank space under the greyed-out Log a note… field. When clicked, this changes to Type “/” for commands.
Once ready, click Schedule to schedule the activity. Alternatively, click Schedule & Mark as Done to close the activity, click Done & Schedule Next to close the activity and open a new one, or click Cancel to cancel the activity.
With the Activity view selected, each activity type available when scheduling an activity is listed as its own column. These columns are Email, Call, Meeting, Maintenance Request, To-Do, Upload Document, Request Signature, and Grant Approval.
To schedule an activity with that specific activity type, click into any blank box on the corresponding row for the desired maintenance request, and click the ➕ (plus) icon. This opens an Odoo pop-up window, wherein the activity can be scheduled.
See also