GPAIS
1. Module Purpose and Operation
The GPAIS module, created by Via laurea, is designed to register, automatically collect records in the Odoo system and transfer data to the Unified Product, Packaging and Waste Accounting Information System (in lithuanian, abbreviated as GPAIS) using the Odoo software interface or in file form.
2. Module Settings
2.1 User (Representative) Settings
- An Odoo system user can use the GPAIS module and export data directly to Odoo when:
Appropriate rights are granted:
Settings → Users → Access Rights → Select “Manager” for GPAIS rights.
The user’s GPAIS RSA key is uploaded, and the GPAIS username is entered. Data is uploaded in the user profile settings:

The RSA key and GPAIS username from GPAIS are obtained as follows:
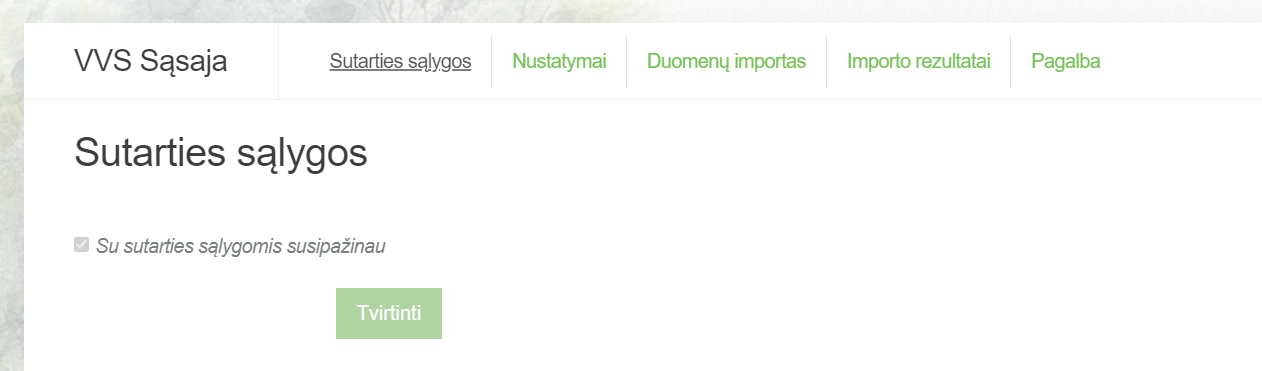
First, contract terms are confirmed upon connecting to the GPAIS system via the ERP interface.
Then, “Generate New” is clicked in the adjacent “Settings” tab:
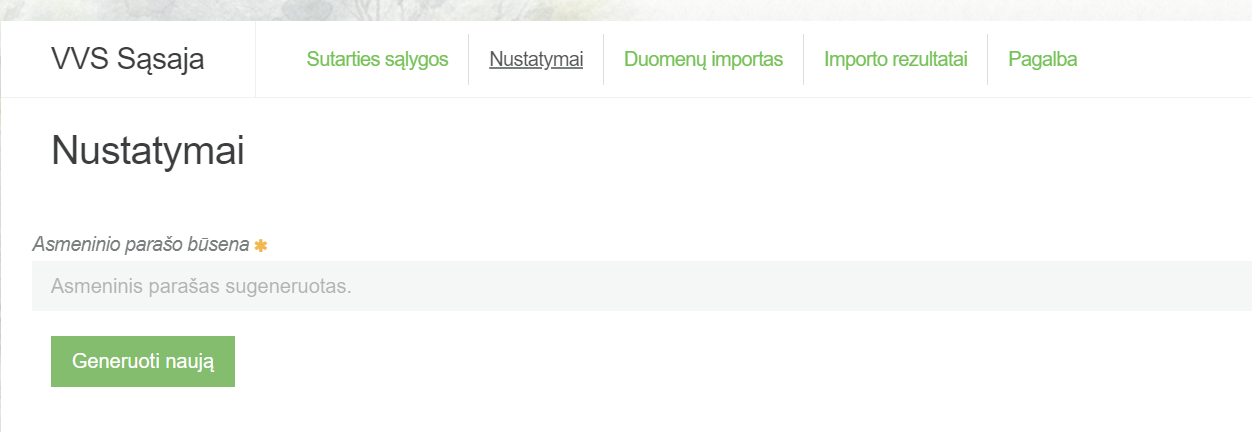
The generated files include: RSA key (“id_rsa”) and username (“username”):

2.2 Flow Registration Settings
The GPAIS flow registration ID number must be specified in Odoo. The process is as follows:
Settings → Inventory → GPAIS Settings → Select relevant flows, enter flow ID numbers, and save.
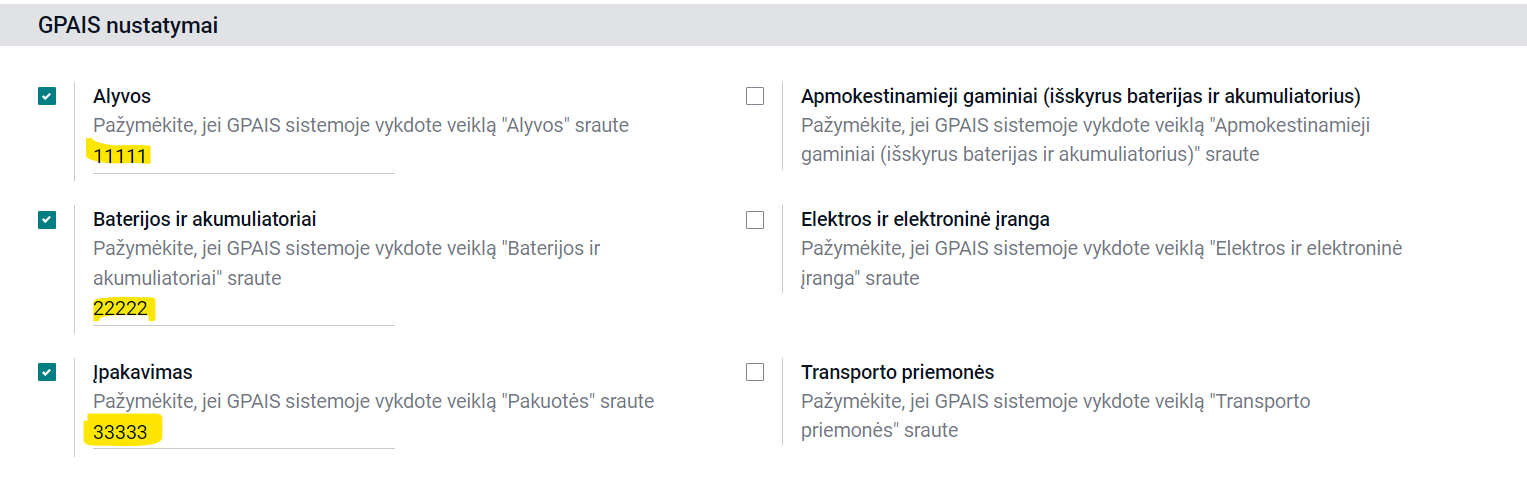
Flow ID numbers are located in the GPAIS account:
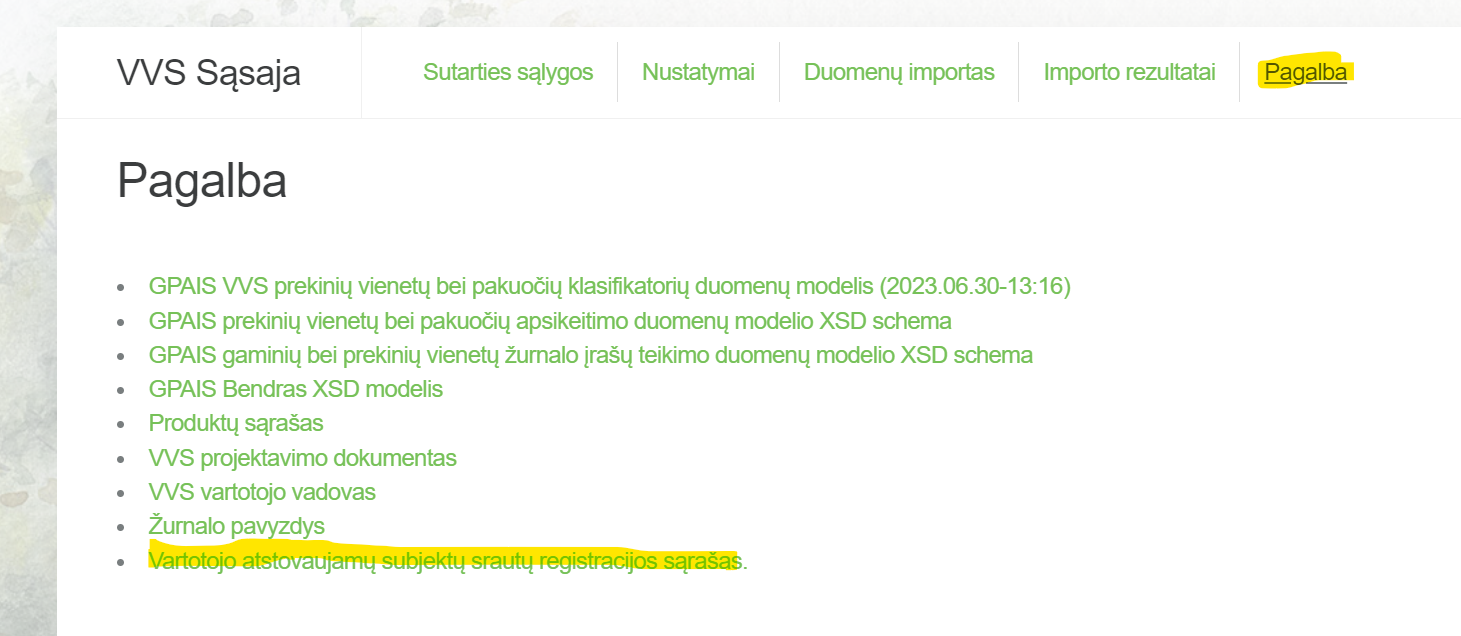
Accessed by clicking on one’s name → ERP interface → Help → List of flow registrations for represented entities → Codes for respective flows are copied from the sent file.
2.3 Mode Settings
Important! It is always recommended to set to test mode in both testing and production environments during the testing, journals, and GPAIS units preparation stage. Test mode should only be turned off when exporting data to the GPAIS operational environment to avoid accidental data transfer to the production GPAIS system.
Test mode is enabled and disabled in the Odoo GPAIS settings:

2.4 Product (Unit) Settings
Every product entering the GPAIS product list must be marked with a “GPAIS product” checkbox.
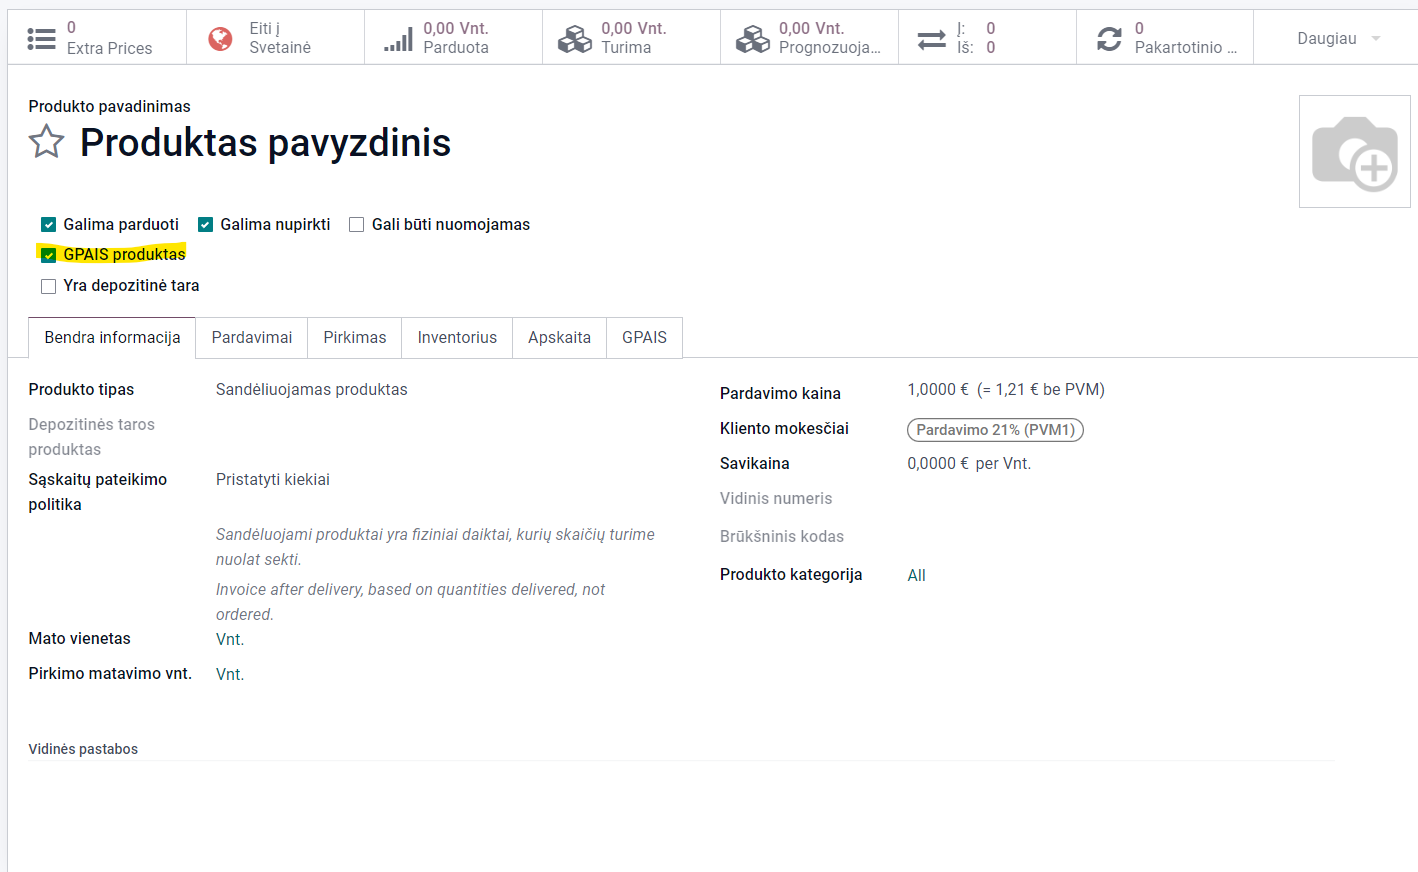
Important! Only after marking the products with the “GPAIS product” checkbox, these products will automatically start to be included in the intermediate GPAIS journal entries list. This means that if product A is marked as a GPAIS product on 02.01, the intermediate journal entries for this product will start to be automatically accumulated from this date. When forming the journal for the period from 01.01 to 03.31, and to include entries for product A for the entire period, new intermediate journal entries must be generated.
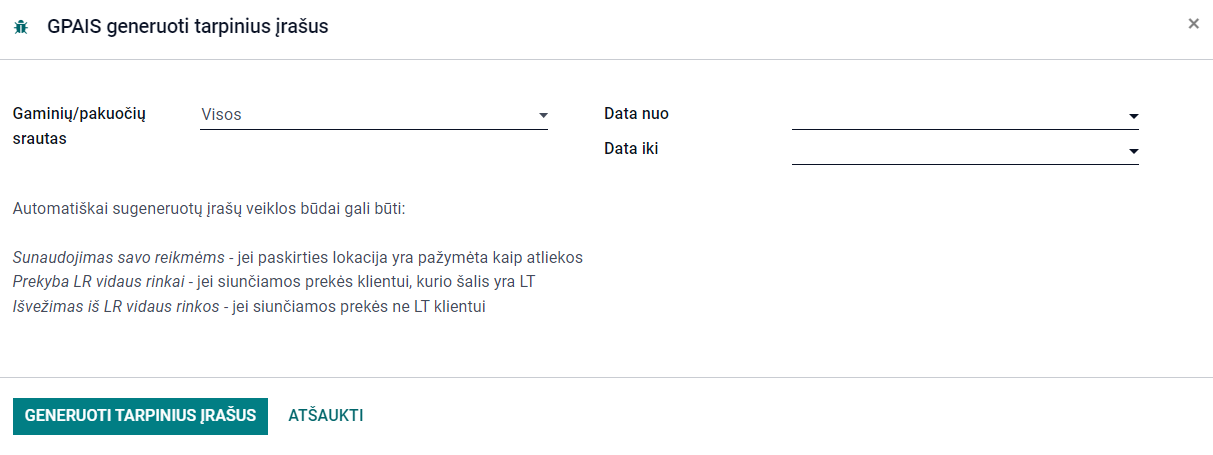
They are generated using the following sequence:
Enable “Developer Mode” → Module “Inventory” → GPAIS → “Generate intermediate records” → In the table (see below) we indicate the flow and period of newly generated intermediate records.
2.5 Classifier Settings
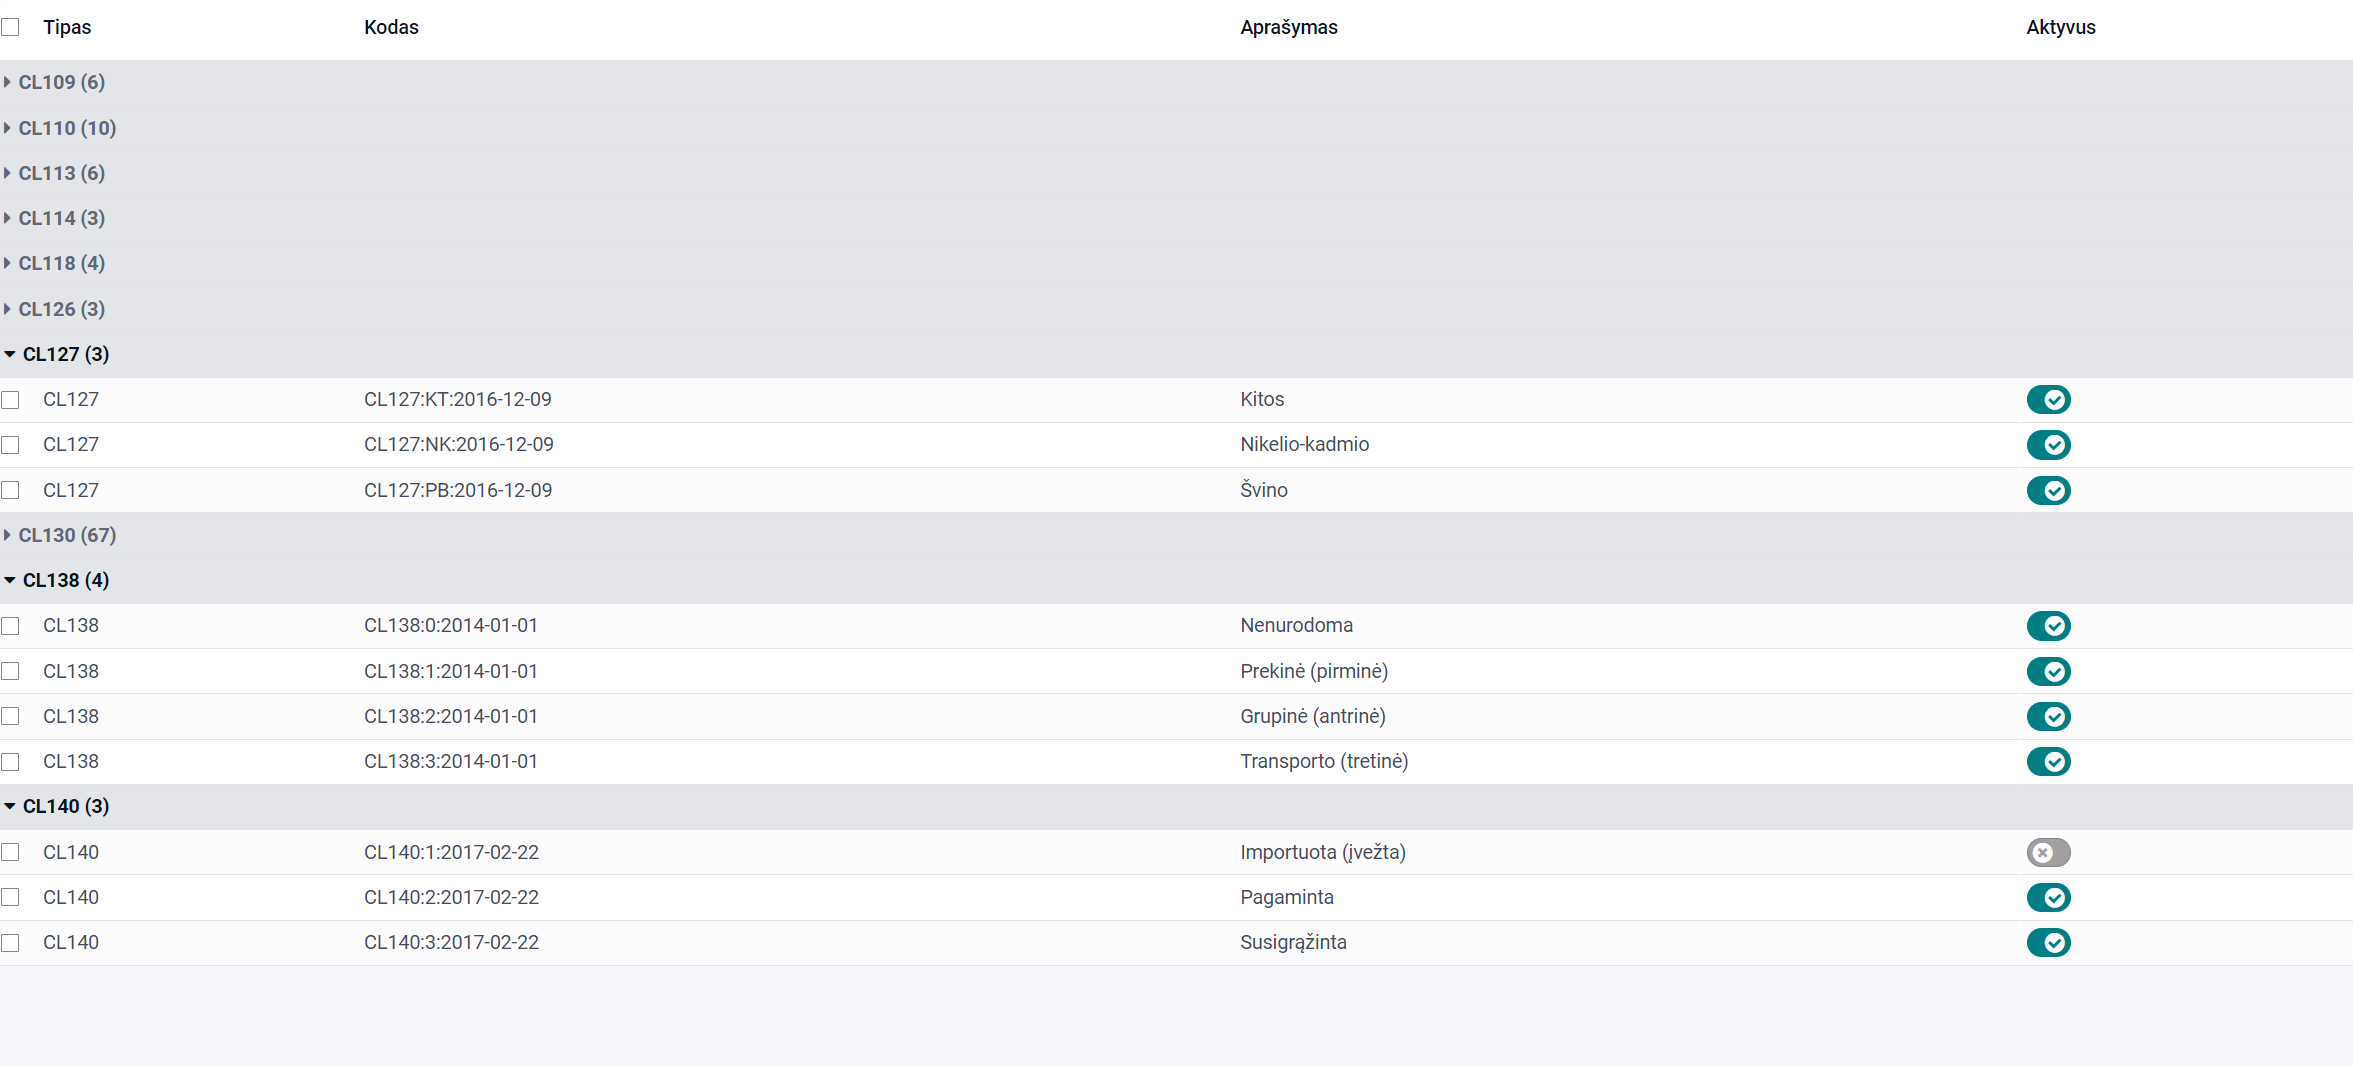
It is recommended to activate only the relevant classifiers in the “Classifications” tab of the GPAIS module. This provides a shorter list of classifiers and reduces the risk of selecting an incorrect classifier. Below is an example list of classifications with activity settings:
3. Product (Unit) Packaging Description
3.1 Basic Product Data
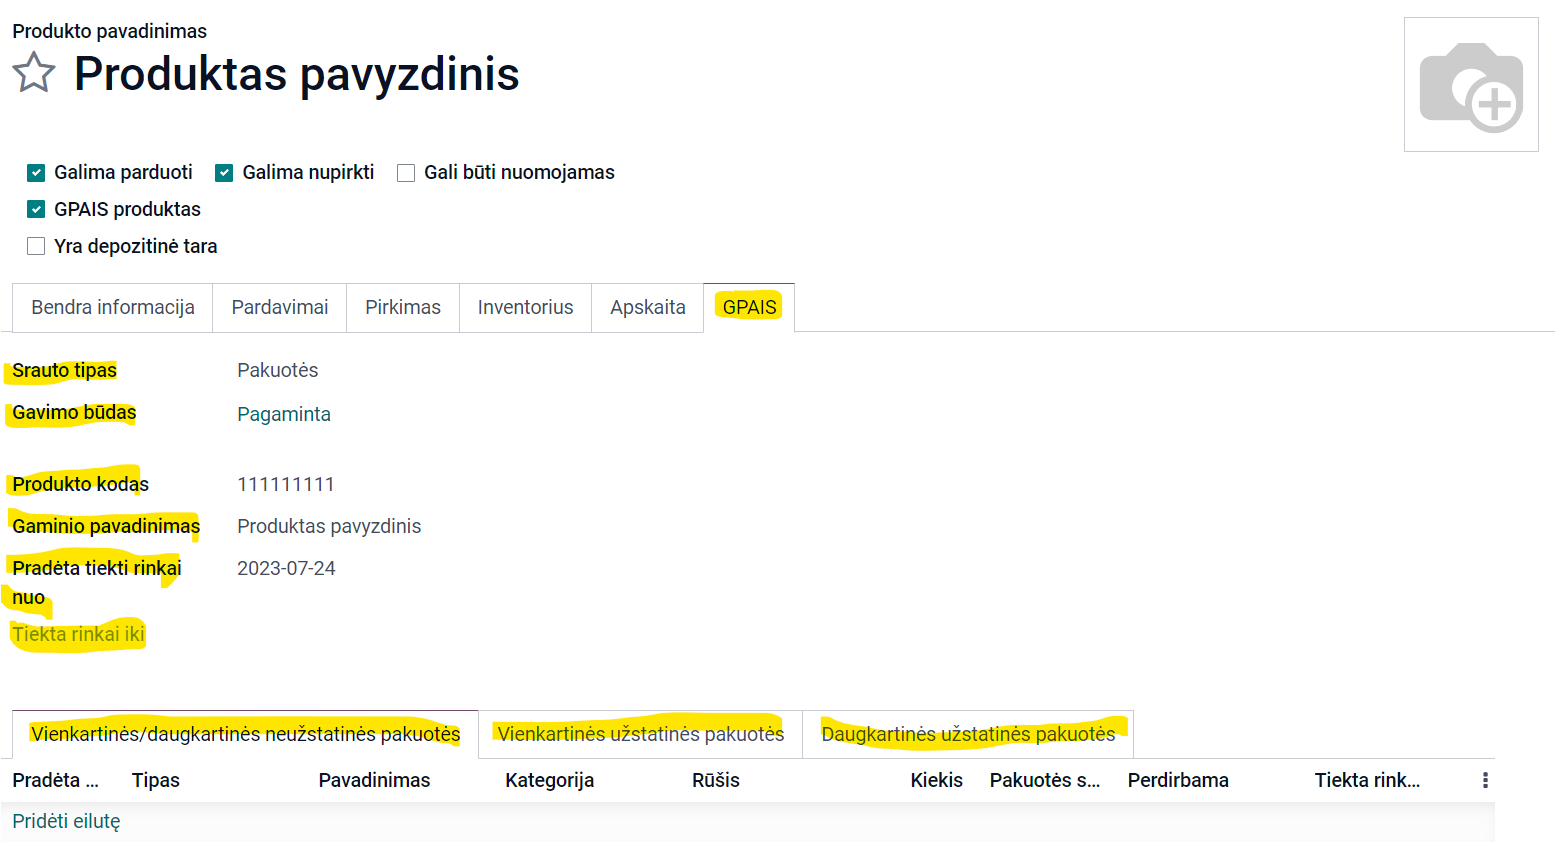
For “GPAIS products,” the product (unit) information to be presented to GPAIS is specified in the “GPAIS” tab:
Flow type - select from the list;
Receipt method - select;
Product code and Product name - enter manually;
Started supplying to the market - indicates the date from which the product began to be sold;
The required tab is also filled in.
3.2 Deposit Packaging
In the case of declaring deposit packaging, such packaging codes and names are filled in the “Deposit Packaging Codes” tab:

Then, when filling out the product (unit) card, the required deposit packaging is selected from the list:

3.3 Declaring Packaging as a Separate Unit
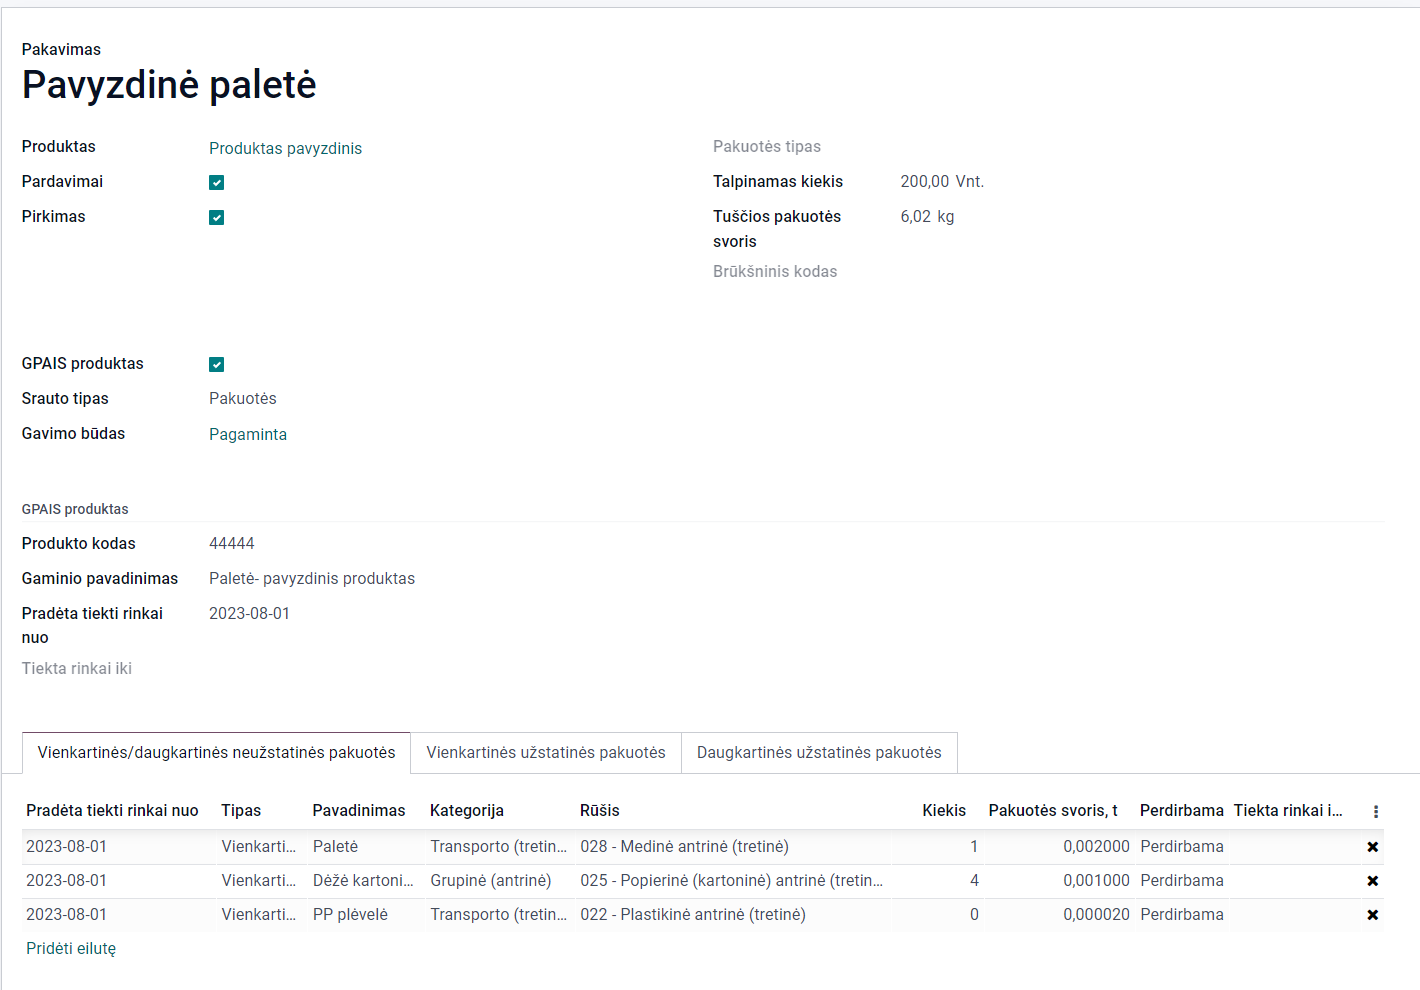
Odoo’s packaging functionality allows products to be bought and sold in packages (illustration below: one avocado and its packaging - a pallet with n units of avocados).

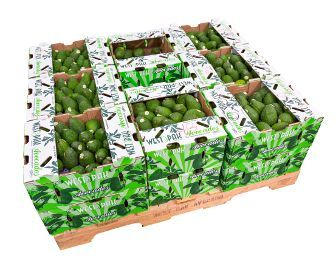
Using Odoo’s packaging functionality, such a package can be described as a separate GPAIS unit and declared in a separate journal entry. In this case, information about the Odoo package is filled in the “Packaging” tab of the GPAIS module and assigned to the corresponding product (example of filling in packaging data below):
4. Data Formation and Export to GPAIS
4.1 Exporting Units
Units are exported to GPAIS using the “Action” button from the product list by selecting several products/packages or directly from the product/package card by pressing the “Export to GPAIS” button:

4.2 Forming and Exporting Journal Entries
By selecting the module tab “GPAIS Journals”, you can choose to create a new journal and fill in the data of the journal being prepared (flow, reporting period information):
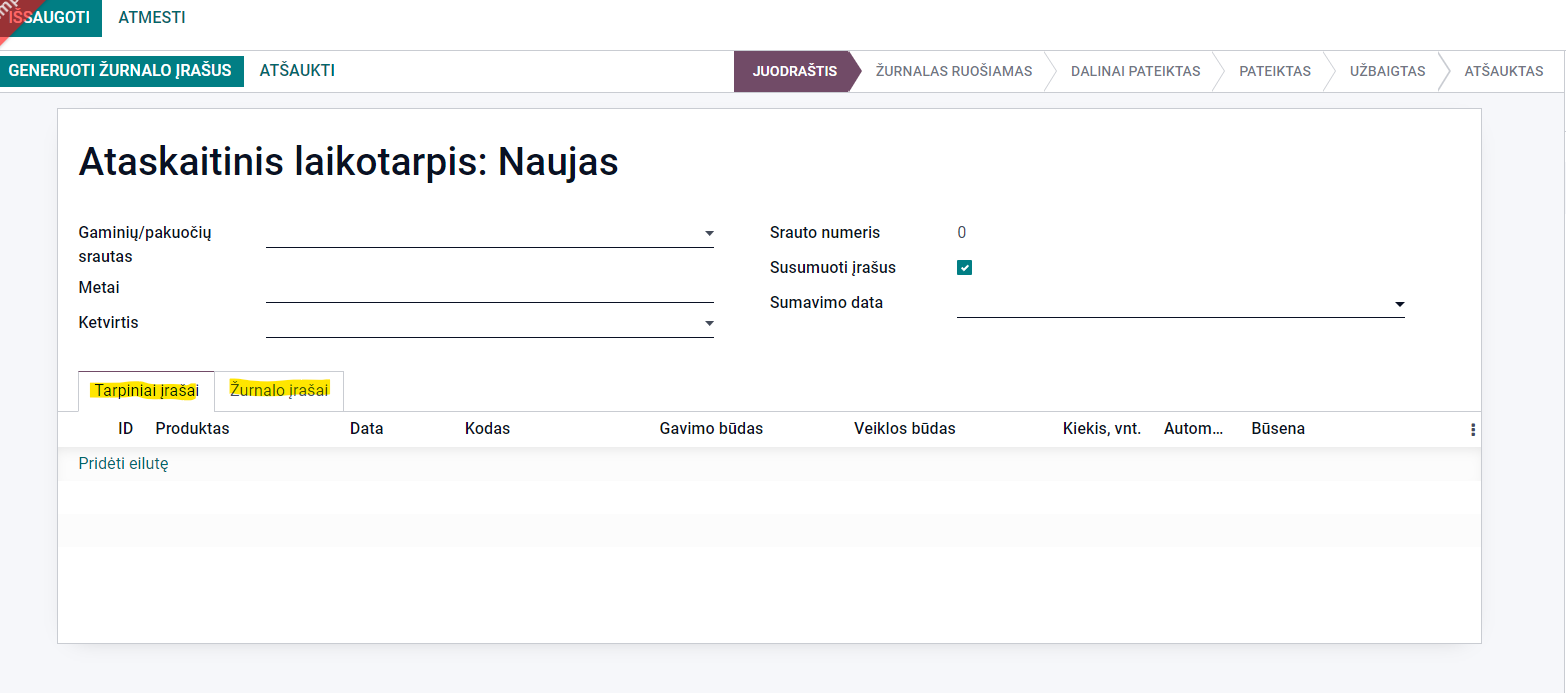
By clicking the “Save” button, a new journal is created, and data on warehouse movements (delivery of goods to customers, write-offs) is automatically collected in the interim records tab. The interim records of the reporting period are summed up in the journal entries by checking the “Summarize entries” box, specifying the date of summarizing the records, and then clicking the “Generate journal entries” button (Important! Before summing the journal entries, it is important to assess whether new products (units) have appeared during the period and whether it is necessary to update the generated interim journal entries, according to the instructions in paragraph 2.4):
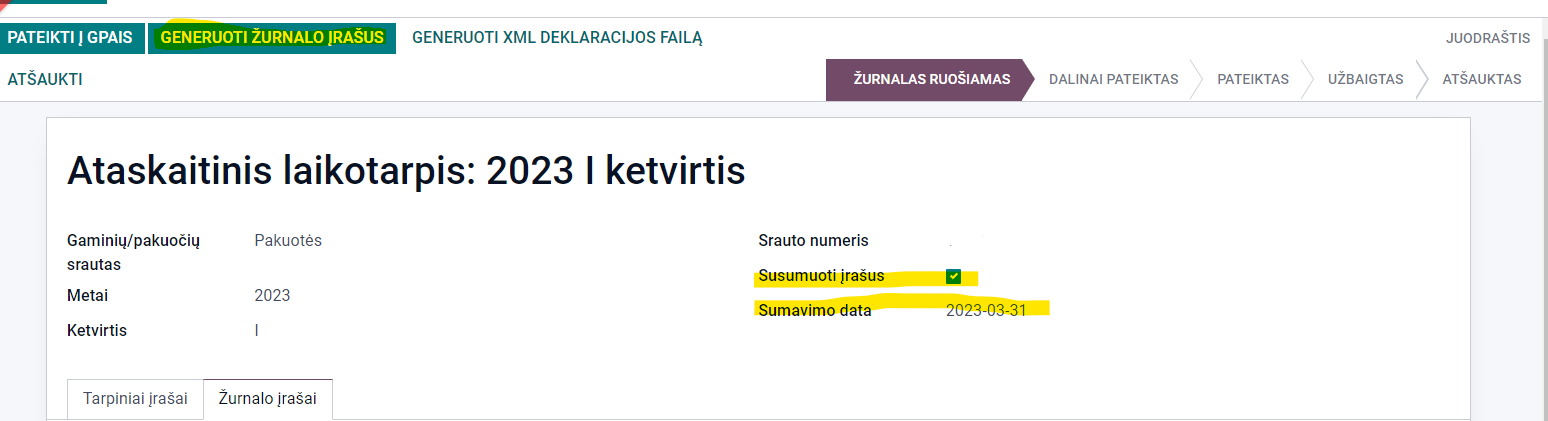
After verifying the summed journal entries and, if necessary, making adjustments, the journal entries can be exported to GPAIS. This action is performed by clicking the “Submit to GPAIS” button.
Journal entries can also be uploaded to GPAIS in XML file format: click the “Generate XML Declaration File” button, and then the generated file can be uploaded to the GPAIS system.
Important! Before confirming the imported journal report in the GPAIS system, it is necessary to recheck the imported data in the GPAIS system itself.